We’re glad to announce that Nimble Streamer now fully supports the Open Media Transport (OMT) protocol, an emerging open-source alternative to NDI® for IP-based media delivery.
What is OMT?
Open Media Transport (OMT) is an open standard protocol designed for low-latency, high-quality media transport over standard networks. It’s free, open source, and royalty free under the permissive MIT license. It was developed to provide an accessible, vendor-neutral alternative to proprietary solutions like NDI, while maintaining similar performance and interoperability goals.
We’d like to thank OMT developers and we appreciate the work of the OMT community for creating this open protocol and making it available to the public.
OMT allows video, audio, and metadata to be transmitted efficiently over IP, making it suitable for broadcast, production, and contribution workflows that require real-time delivery. The introduction of OMT brings a truly open standard to IP video transport, enabling developers, integrators, and content creators to build interoperable solutions without licensing constraints. You can find the full list of OMT-compatible products on Downloads page.
OMT in Nimble Streamer
By adding OMT support, Nimble Streamer continues to expand its role as a universal media transport platform, bridging open and proprietary protocols within one unified system.
Starting with the latest release, Nimble Streamer supports all features available for NDI sources and outputs when working with OMT streams.
This includes:
- OMT input: receive video and audio streams from OMT sources.
- OMT output: transmit live content from Nimble Streamer to OMT-compatible receivers.
- Full transcoding support via Nimble Live Transcoder: decode, filter, and re-encode OMT streams in complex scenarios.
- SEI-based NTP synchronization: precise timestamping and synchronization across multiple streams for professional workflows, see description below.
- Out-of-process operation: to bring better redundancy, see description below.
- Multi-protocol pipelines: combine OMT with other formats such as RTMP, SRT, RIST, or SLDP for flexible ingest and delivery.
- WebRTC and SLDP bridging: use OMT as part of ultra-low latency workflows for real-time contribution and playback.
How to set up OMT in Nimble Streamer
Here’s how you can set up and use OMT in Nimble Streamer.
1. Installation
Handling OMT requires Nimble Live Transcoder because the streams must be either decoded from or encoded to OMT format.
Notice that OMT support in Nimble is available only on Ubuntu 22.04 and 24.04 at the moment. We’ll make other platforms available later on, let us know if you need some specific platform support.
Before moving forward, you need to install the following and make subscription where necessary.
- Sign up for WMSPanel account.
- Install Nimble Streamer on a proper server and register it in WMSPanel. If you’d like to install SRT package, please also refer to proper instructions.
- Subscribe for WMSPanel.
- Create Live Transcoder license and subscribe. This short video shows the process.
- Install Live Transcoder package and register the license on the server with Nimble Streamer instance.
Once it’s complete, you’ll have a paid WMSPanel account, a running instance of Nimble Streamer with Live Transcoder package, ready to transcode streams from and into OMT. For more details about Live Transcoder usage please refer to documentation reference and our video tutorials.
2. Set up OMT input
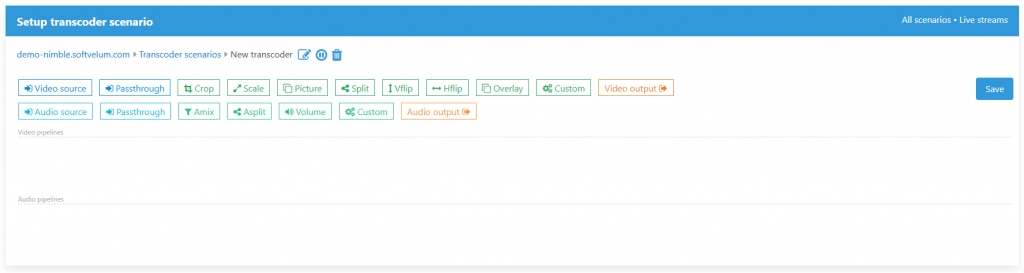
To get the OMT stream in, you need to create a Transcoder scenario. In your WMSPanel account, click on Transcoders menu to open scenarios page, then click on Create new scenario button. You’ll be redirected into an empty scenario.
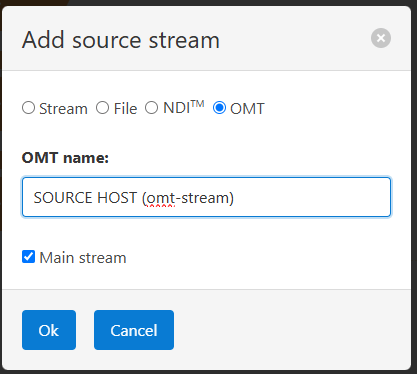
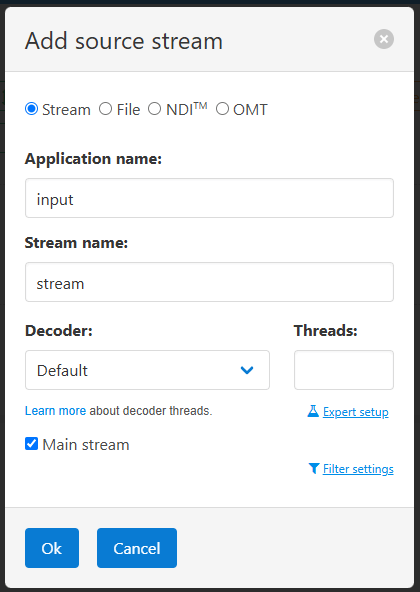
Now drag a blue video source element, then select OMT option.
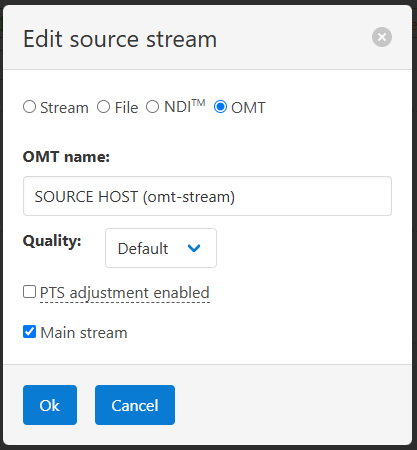
In OMT name field you need to enter your source OMT stream. It can have both host name and stream name, but you may use just stream name. In cast of host and stream name you need to use “SOURCE_HOST (source_stream)” format with source host name as “SOURCE_HOST” and stream name as “source_stream”. We use full format in our example.
Notice the Quality parameter for selecting quality levels. It’s set to Default and you can also choose Low, Medium and High. Please refer to OMT documentation for more details.
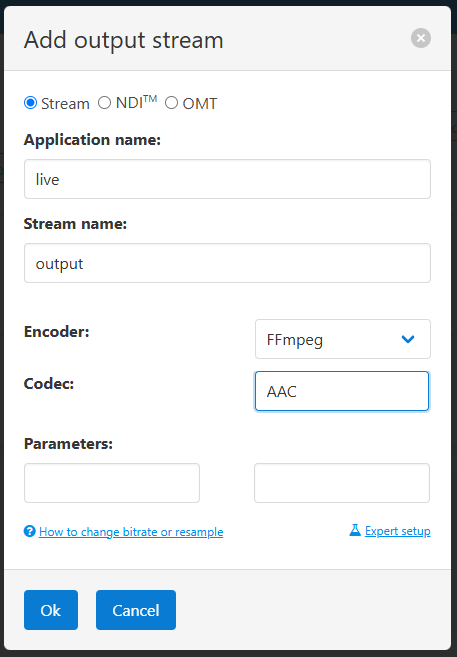
Now you can create the video output element, just drag the orange element and keep the output type as “Stream”.
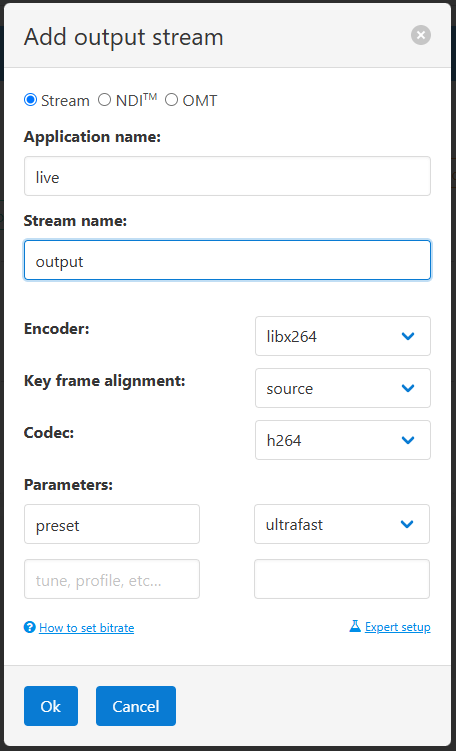
Application and stream name define the naming of your output stream for further reuse. You may leave other values by default if you find them appropriate or define other parameters and values, like different codec or encoder library. Once you save encoder settings, you need to link decoder and encoder elements, just drag an arrow from the decoder to the encoder.
You may also put any filters between decoder and encoder in case you need to additionally transform the content, like to split the stream and make various renditions.
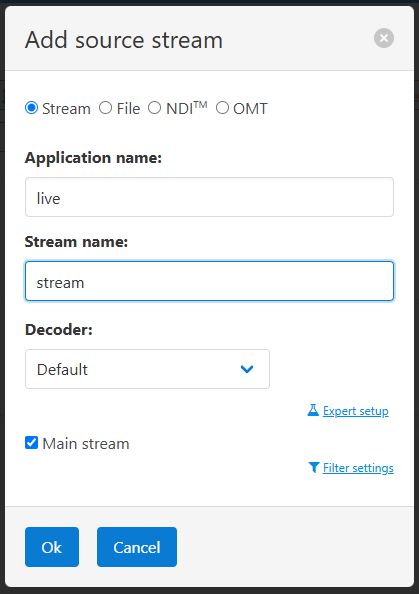
Once you’re done with video pipe, you need to do the same for audio part of your input content. Drag audio source and select OMT stream as input. You need to define the same input stream name as you did for video.
Now add audio encoder element.
Here you specify the same output app and stream name, then you may choose codec and encoder. Once you save settings. You need to connect decoder and encoder, unless you want to apply some filters like volume changer.
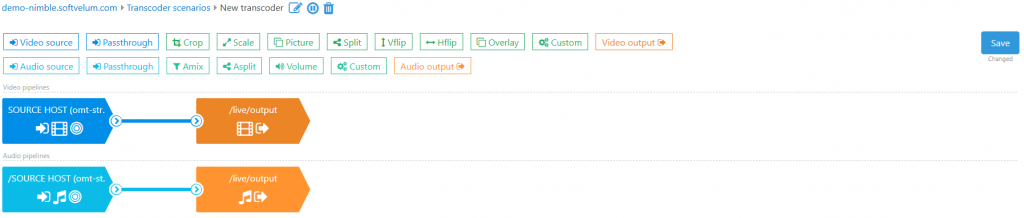
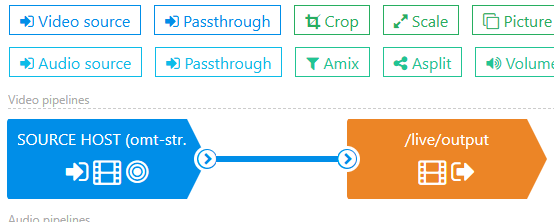
That’s it. Now once you save scenario, it will sync up with Nimble Streamer within several seconds and your server instance will start receiving OMT stream to process it and generate the output stream.
You can now play this output stream to make sure it’s available. The example of HLS output stream URL will be http://yourhost/live/output/playlist.m3u8 for default settings. Any playback protocols enabled in server global settings or in respective application settings, will be available as well, including SLDP, MPEG-DASH etc. You can also handle this stream further according to your use case, like re-publish it via SRT or re-publish via RTMP. Of course, you may also apply any paywall and security features to such output, as it’s a regular output stream.
In addition to the aforementioned “direct output” transcoding pipe, you can add more filters and generate multiple outputs for ABR ladder. Check this scenario as example:
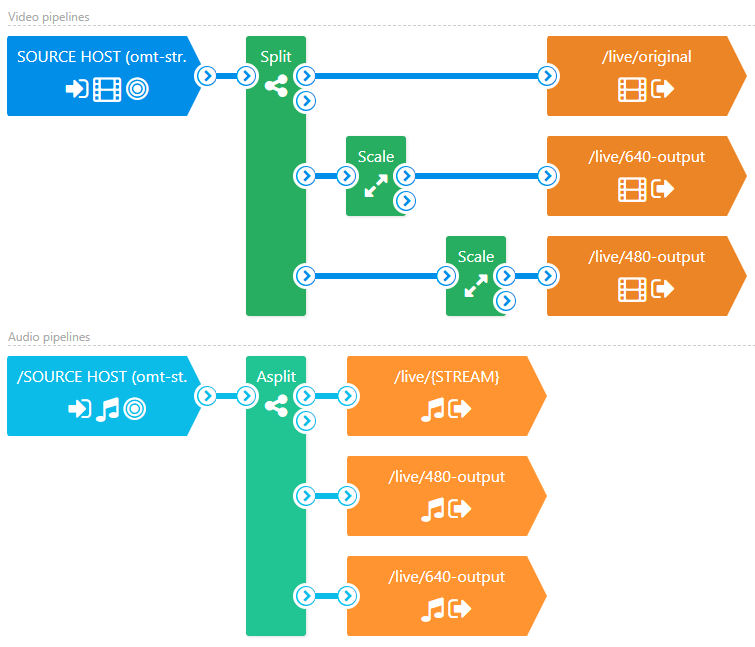
It has video split filter after OMT decoder, then it makes direct output with original rendition, scales down to 640p and 480p, and encodes all 3 outputs. The decoded audio is also split into 3 output streams. You can check other examples of transcoder workflow in our YouTube playlist and Transcoder documentation.
3. Set up OMT output
Setting OMT output is somewhat similar to input setup process.
First, make your live stream input available for further processing, read our documentation for details:
- Receiving SRT
- Getting published RTMP
- Processing MPEG-TS
- RIST setup
- RTSP setup
- Icecast setup
- and any other live streaming protocol.
You can check other protocols and use cases on live streaming digest page.
Once you have your input stream ready and tested, you can proceed with OMT output setup.
Go to your transcoder setup and create a new scenario.
Video input will have your processed incoming stream application and stream name. You may choose another decoder if you want as well.
Drag and drop encoder element and select OMT as output option.
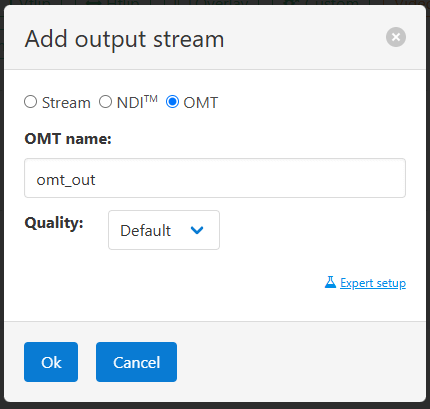
Now specify output stream name, this is how it will be recognized by other OMT recipients in this network. You may also define Quality parameter for selecting quality levels just like you did for OMT input above. Please refer to OMT documentation for more details.
Click Save in this dialog and connect video input and output, like you did in previous pipeline.
Now add audio input having the same stream app and stream name.
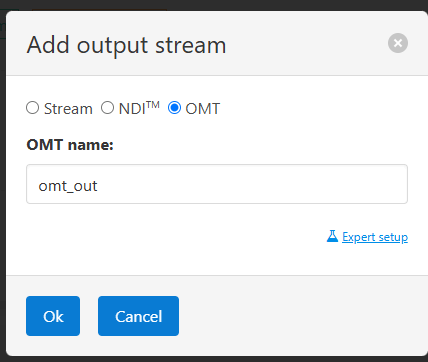
Then add encoder element with OMT selected in it. The stream name needs to be the same as you specified in video output.
When you save audio output, connect input and output. You’ll have a scenario like this:
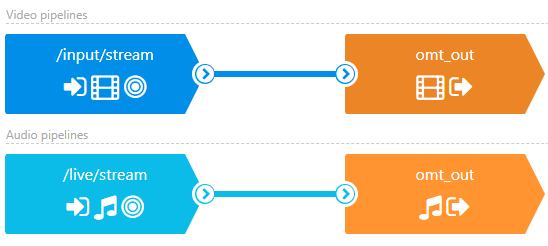
When you save this scenario, it will be synced within several seconds.
Once the scenario settings are synced, your Nimble Streamer will start sending OMT output with the content defined by our scenario.
Just like you saw in previous section, you may create more complex scenarios.
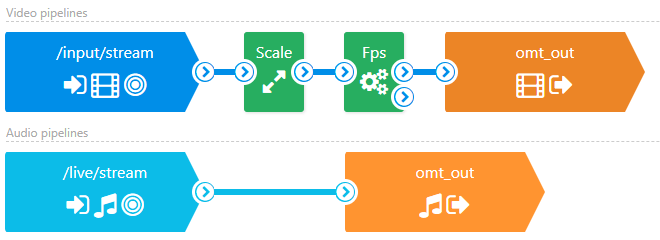
In this example the audio is encoded without changes while the video is scaled down and then custom “fps” filter is applied to change the framerate.
4. OMT monitoring tool usage
In addition to implementing OMT in Nimble Streamer and Live Transcoder we’ve created a tool which helped us debugging OMT workflow. It’s a command line utility called “nimble_omt“. It works if Nimble Streamer and Nimble Live Transcoder are installed with no need for registering Nimble instance or Transcoder license.
At the moment it provides one function of getting the list of available streams. Let us know if you need other functions so we could add them as well.
Log into the server where Nimble Streamer is installed and run this command:
nimble_omtIt will show the list of streams as “host name (stream name)”, like this:
PRODUCER (main)
PRODUCER (secondary)
WIN10 (vMix - Output 1)
WIN10 (vMix - Output 2)
That information can be used as a reference for OMT setup in previous sections. For example, having this output, you can use host and stream – “WIN10 (vMix – Output 1)” – for your OMT input setting.
5. SEI metadata NTP sync-up for OMT
Nimble Streamer supports SEI metadata processing for synchronizing output NDI streams and it’s fully applicable for OMT outputs. Using this feature you can take multiple input streams and line them up to make in sync with each other which is important when you need to show the same event from different video sources.
6. Other related feature sets
Another important feature set is the out-of-process Transcoder mode that brings additional redundancy to OMT pipelines. If any underlying libraries fail during streaming, it will not freeze or crash your Nimble instance. Instead, it will gracefully handle the failed process, and the stream will continue further properly.
Any NDI-related features and tutorials that our team has created earlier, are also applicable to OMT streams, it’s just a matter of selecting OMT instead of NDI in these workflows. This provides seamless transition from NDI to OMT without any bad user experience or lack of any capabilities.
Check out these NDI video tutorials applicable to OMT:
- Converting NDI to Apple Low Latency HLS video which demonstrates how to get NDI source input and produce LLHLS output with proper latency.
- NDI to SRT to AWS Elemental MediaConnect via Nimble Streamer showing NDI transformation into SRT for MediaCOnnect republishing.
- Converting NDI into DRM-protected MPEG-DASH with Widevine and EZDRM.
- Recording NDI as HLS DVR for further playback with Nimble Streamer.
As we’ve mentioned above, you can use any NDI docs to OMT-enabled scenarios.
Nimble Streamer allows keeping the low latency of OMT streams for end-user WebRTC delivery. Read NDI to WHEP: converting local video feeds for WebRTC delivery article to apply the same settings to OMT. The reverse scenario works perfectly as well – you can use WHIP input to generate OMT output, this will be the ultra-low latency delivery from source into your production pipelines.
Contact us if you have any questions regarding OMT support in Nimble Streamer.
Follow us in social media to get updates about our new features and products: YouTube, Twitter, Facebook, LinkedIn, Reddit, Telegram.
NDI® is a registered trademark of Vizrt.