Nimble Streamer team already has DeckLink SDI input support. This allows producing any supported live protocols and codecs from your Blackmagic-compatible SDI sources.
And now, we complete the pipeline by adding SDI output support in Nimble Streamer for those Blackmagic-compatible devices. You can take any live source that is processed by Nimble Streamer and transfer content into your connected SDI devices.
Prerequisites
The SDI feature set requires the latest versions of Nimble Streamer and Live Transcoder packages. Currently SDI support is available on Ubuntu 22.04 and later versions. Please refer to Nimble installation page and Transcoder installation page for upgrade details. Also, make sure you have Transcoder license activated on your Nimble instance in order to make Transcoder work there.
Get available SDI devices
Once the latest Transcoder package is installed, you need to launch nimble_sdi tool in order to get the list of SDI devices ready to get the content from Nimble:
/usr/bin/nimble_sdiIt will generate the list of all SDI devices, like this:
Found 4 SDI devices:
81:8c1580a0:00000000, DeckLink Duo (1)
81:8c1580a1:00000000, DeckLink Duo (2)
81:8c1580a2:00000000, DeckLink Duo (3)
81:8c1580a3:00000000, DeckLink Duo (4)
If this command fails, please install the latest drivers for your SDI device. That’s version 15.3 at the moment but you may use some more recent one when you read this.
Nimble API for DeckLink outputs list
Nimble Streamer native API allows obtaining the list of available DeckLink outputs like you would do by using nimble_ndi command line tool. The URL for API call is this one:
http://127.0.0.1:9999/manage/sdi/sinkl-ist
Visit Nimble API reference for API access setup details.
Create Transcoder scenario with input
To create SDI in your streaming pipeline, you need to create a Live Transcoder scenario, add inputs via decoder elements, some optional processing filters and then create SDI encoding elements. That will generate live stream output into the designated SDI device. Here’s what you do to make that happen.
We made a sample scenario.
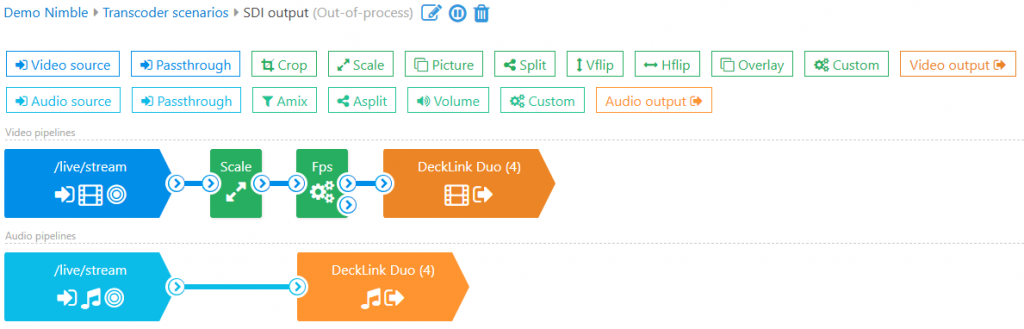
The blue input elements simply decode video and audio for further transformation. Here’s the video one:
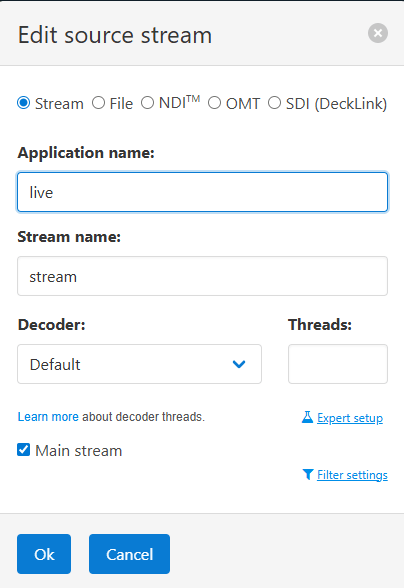
You may use any decoder of choice. If you have GPU, you can use it too. Please refer to Transcoder docs reference for examples of that.
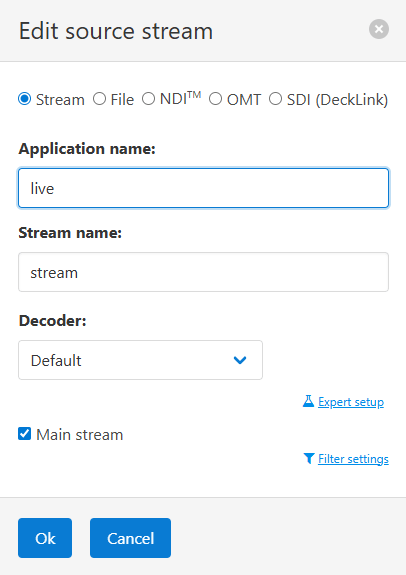
Audio decoder is simple, you can use default settings.
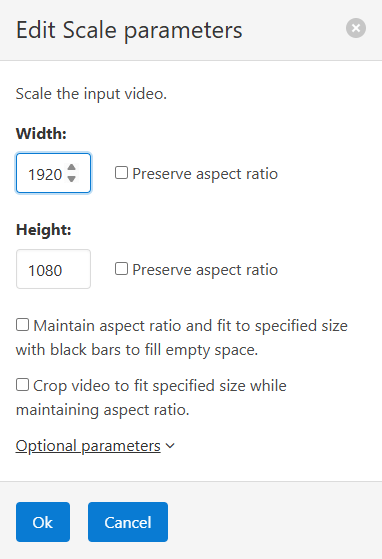
Prepare framerate and resolution
After decoding, you may add filters to transforms content as needed.
It’s important to keep the same frame rate and resolution as your SDI output requires. You need run ffmpeg with specific option to see full list of supported formats. In order to do that you need to build FFmpeg with DeckLink support on the same server where you installed Nimble Streamer.
Once you have your ffmpeg build ready, run it with list_formats option for your designated SDI output:
> ./ffmpeg -y -f decklink -list_formats 1 -i 'DeckLink Duo (4)'

Supported formats for 'DeckLink Duo (4)':
  format_code  description
  ntsc    720x486 at 30000/1001 fps (interlaced, lower field first)
  pal     720x576 at 25000/1000 fps (interlaced, upper field first)
  23ps    1920x1080 at 24000/1001 fps
  24ps    1920x1080 at 24000/1000 fps
  Hp25    1920x1080 at 25000/1000 fps
  Hp29    1920x1080 at 30000/1001 fps
  Hp30    1920x1080 at 30000/1000 fps
  Hp50    1920x1080 at 50000/1000 fps
  Hp59    1920x1080 at 60000/1001 fps
  Hp60    1920x1080 at 60000/1000 fps
  Hi50    1920x1080 at 25000/1000 fps (interlaced, upper field first)
  Hi59    1920x1080 at 30000/1001 fps (interlaced, upper field first)
  Hi60    1920x1080 at 30000/1000 fps (interlaced, upper field first)
  hp50    1280x720 at 50000/1000 fps
  hp59    1280x720 at 60000/1001 fps
  hp60    1280x720 at 60000/1000 fps
You can see the list of resolutions with respective frame rates that work the best for your particular hardware.
If the input resolution and framerate of your input stream don’t match the supported format of your SDI device, then you need to put proper filters to alter the content. E.g. for “Hp30” format we’ll have the following filters.
This one is for resolution:
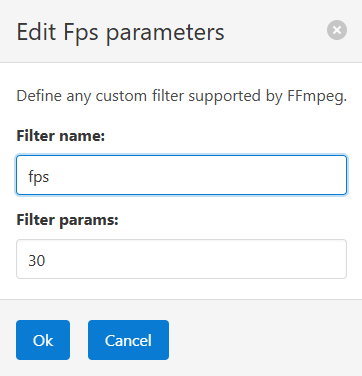
And this one is for FPS, added as a Custom filter:
Now, let’s proceed with SDI encoding.
Encoding SDI for output
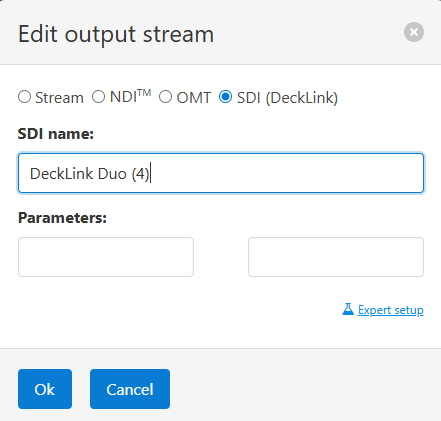
Use encoder element for video and choose SDI as its type. Then add the device name into SDI name field, as show in the “Get available SDI sources” section above:
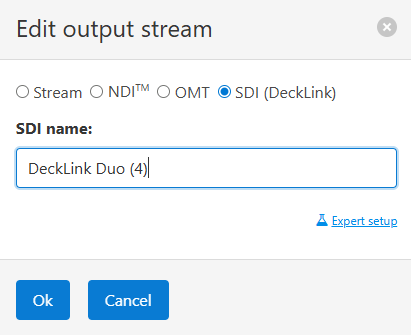
Then add encoder for audio with SDI as a type and SDI name as your device’ name.
That’s it. Once you save the scenario, your SDI device will start getting content from your source.
AJA SDI support in Nimble Streamer
Nimble Streamer now supports AJA SDI SDK for both input and output. This allows handling both DeckLink and AJA devices with Nimble with high performance and low resource consumption.
Out team is working on improving SDI feature set.
Take a look at SDI and NDI interconnection with Nimble Streamer article to see how you can combine SDI with NDI (and OMT).
Stay tuned for our updates and if you have any questions, issues or suggestions, please contact our engineering team.