Nimble Streamer’s Live Transcoder is built to work with a wide range of decoding, filtering, and encoding libraries. Every component included in the standard deployment has been thoroughly vetted for performance, stability, and proper licensing before being made available out of the box.
However, many customers reach out asking us to include additional libraries – from open-source encoders and commercial solutions to their own custom-built modules. Since it’s not feasible to bundle every possible library, this often limited what could be done with Transcoder and left advanced use cases underserved.
To address this, we’ve introduced support for custom FFmpeg builds. This lets you integrate additional video/audio encoders and filters – even those not part of the standard package. Because Live Transcoder uses FFmpeg under an LGPL license, you’re free to rebuild and extend it with new functionality. All related scripts are in our GitHub repo.
Following customers’ feedback, we created a new script that encapsulates the entire build process using Docker. It’s compatible with Ubuntu 20, 22, and 24. In this post we’ll provide the instructions to extend your Live Transcoder functionality, and will give examples of encoding and interlacing custom filter.
1. Legal disclaimer
This article explains how to build custom third-party FFmpeg libraries and use them in Nimble Live Transcoder, alongside the libraries included in the standard Live Transcoder package.
Each custom-built FFmpeg library is subject to its own licensing terms. Therefore, every library must be reviewed for licensing compliance before use or distribution, including any associated patent licensing terms.
The responsibility for ensuring proper licensing and avoiding any license or patent infringement lies solely with the party who builds and uses the custom FFmpeg libraries. Softvelum does not assume liability for any violations arising from such custom builds.
2. Building FFmpeg in Docker
Let’s start with initial setup and proceed with the building process itself.
2.1 Install Docker and set permissions
First, install Docker on your server:
apt install docker.ioSecond, run the following commands to manage Docker as a non-root user:
sudo usermod -aG docker $USER
newgrp docker
You can also check other post-installation steps to fit Docker into your environment.
2.2 Building FFmpeg
With Docker properly set up, you can now get the build scripts from our GitHub repo and run them:
git clone https://github.com/Softvelum/ffmpeg-build-scripts.git
cd ./ffmpeg-build-scripts/ffmpeg-docker-builder
./build.sh
During the last step, the script will try to copy the resulting libraries into proper directory, so it will request root password for that.
The script will do the following:
- Create a Docker image.
- Install all required dependencies into the image.
- Build all the libraries.
- Libraries will be copied from the image to the host.
You can find the image under “nimble-ffmpeg-builder-ubuntu-<version>” name, where version is “20.04”, “22.04” or “24.04”, depending on your server’s Ubuntu version. Using Docker, your host will not have any “collateral” files.
You may remove the image afterwards to save disk space using command like this:
docker image rm nimble-ffmpeg-builder-ubuntu-24.042.3 Re-start Nimble
The last step will be to re-start Nimble instance:
sudo service nimble restartThat’s it, you can now use new libraries in Live Transcoder using our web UI.
3. Using custom libraries in Live Transcoder
Create a Transcoder scenario as usual and add new encoder and filter elements. You can watch this tutorial video to see how transcoding scenarios are created.
3.1 Custom video codec
For custom video codec follow these steps:
- Drop video encoder element.
- In the “Add output stream” dialog, the “Encoder” dropdown menu must be set to “FFmpeg” value.
- In “Codec” field you need to specify the encoder name as defined in video encoder library, e.g. “customvideocodec“.
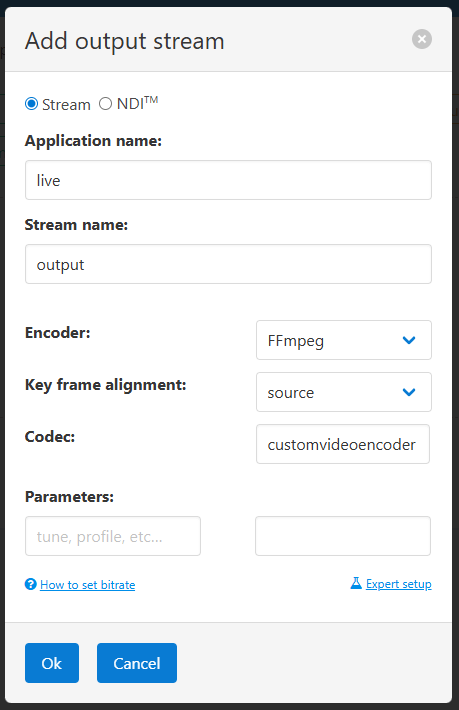
Besides just a name, you can specify whatever parameters that are used in your custom encoder.
3.2 Custom audio codec
Custom audio codec is added the same way:
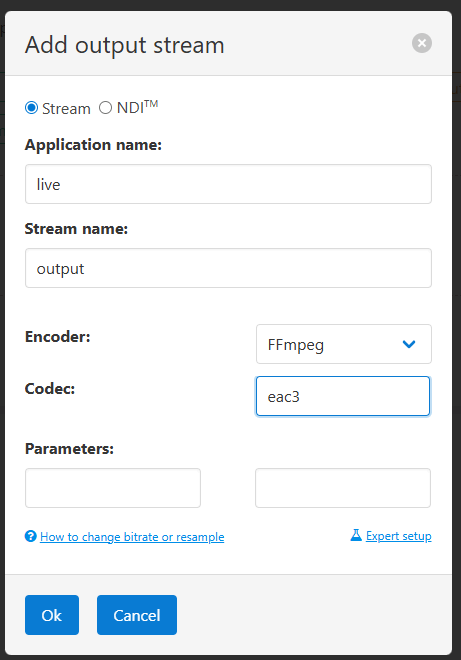
- Drop audio encoder element.
- In “Add output stream” dialog, set the “Encoder” field to “FFmpeg“.
- In “Codec” field, specify the encoder name.
3.3 Custom filter (e.g. tinterlace)
Custom filter is also easy to add. Here’s an example for interlacing filter which is added by tinterlace filter of FFmpeg:
- Drop “Custom filter” element.
- Set “Filter name” to “tinterlace“.
- Set “Filter parameter” to “4“.
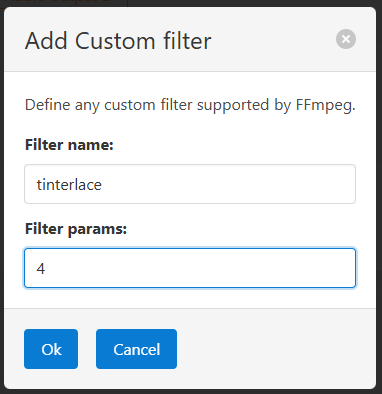
In this case we set value to “4” which stands for “interleave_top“, see ffmpeg documentation for details.
Any other custom filter can be added the same way.
Let us know how this works for you and what other OSes you’d like us to cover the same way.